
In the designing stages of our new build Quartz countertops were always at the top of my list for the kitchen. Fast forward through many hiccups, unexpected costs, and a total of almost 3 years later and my plans had to shift a little bit. We knew that we would be moving into this house with lots to finish up still and had to put certain things on the back burner for now, quartz being one of them!
As I looked for different options that would fit within our budget, I came across a few posts on Pinterest about installing laminate countertops. I had to do a double take because the photos did NOT look like what my mind had remembered laminate countertops to be. I came across laminate sheets made by Formica and loved that they had such realistic marble/veining looks! Fun Fact: Formica purchases marble slabs and scans them to create the designs they offer, so that’s why it looks so real!
Some of my top color choices were:


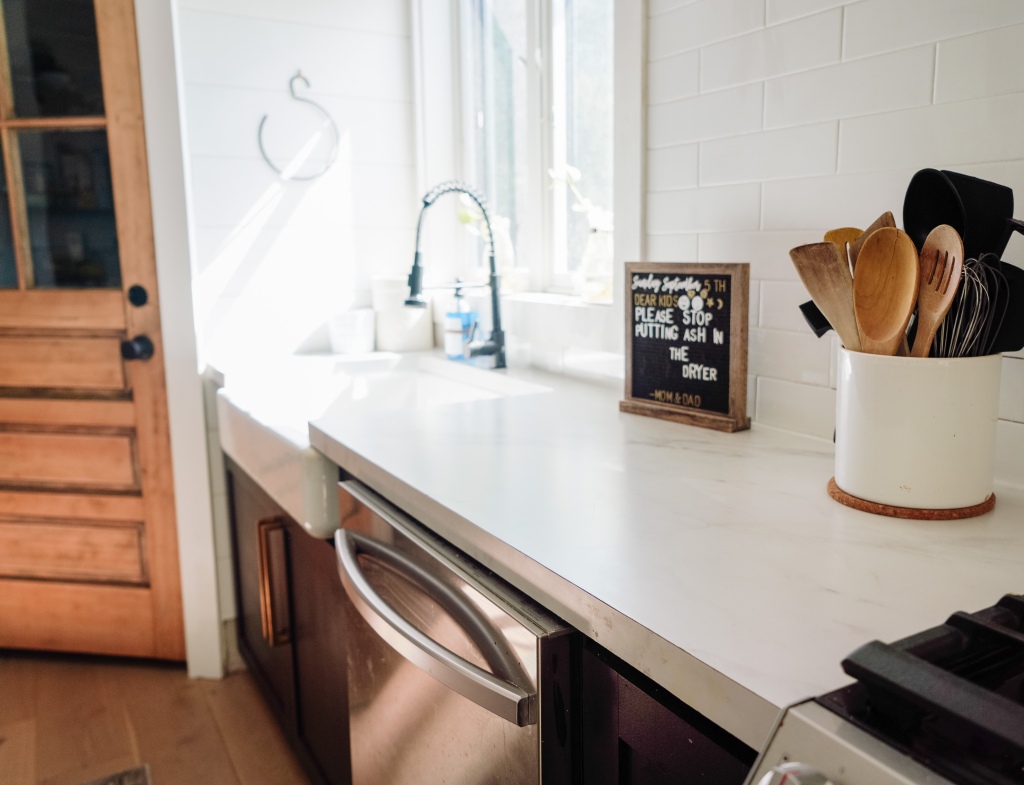
We ended up choosing Calacatta Cava and I was so happy when we received it! The veining is soft and very realistic. It is exactly what I had envisioned for our countertops! Now comes the fun part of installing them! YES we did that too! Here is a list of supplies needed:
- 4×8 sheet MDF – number of sheets will be based off the size of your counter space!
- Laminate sheets – number of sheets will also depend on your countertop space!
- Saw
- Glue
- Router
- Small paint roller
- Tape Measure
We used MDF as our countertop base. Under each sheet we lined the bottom with slats of MDF to give a total thickness of 1.5”:

Once you have secured your slats you can flip over and you now have your counter top base!
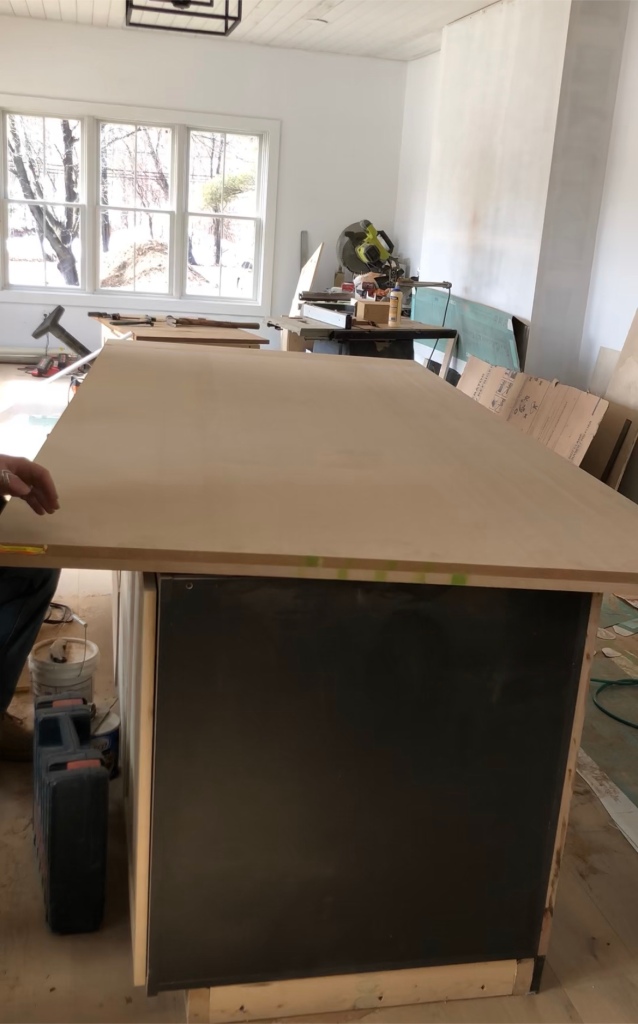
Next, cut your laminate sheets to size. We cut our edge pieces with a little extra room. One the glue was secure, we used a router to trim the excess.

Once all sides are on you will apply the top! This is a neat process and can be a little tricky! Here is a video of the process so you can see!
Once your surface is down, you’ll take your router again and clean up the edges! This step is important because if you are not using an edger you’ll get a brown line. You’ll want to keep this as minimal as possible.
And for those wondering YES we were able to under mount our farmhouse sink!


Let us know if you decide to tackle this project too! We would love to see yours! I have also have a reel with this process here!


Beautiful! How have your countertops held up to food stains? We eat a lot of curries here and aren’t always the neatest cooks. I love white countertops but am a bit nervous to commit. Do you think ours would end up being white with random splotches of turmeric yellow?
LikeLike
We also use turmeric a lot! My husband is not the nearest cook either lol but so far they clean really well and I haven’t gotten a turmeric stain yet!
LikeLike
This is good news indeed! Think we’re going to go for it then. Thank you!
LikeLike